
1.
Plan Your Course
Start by carefully planning your course. Decide exactly what skills or knowledge you want learners to gain by the end of each section or lesson. You can download and use the provided (optional) planning template to assist with this process.
When structuring your course, follow a logical sequence — for example, moving from simpler concepts to more complex ones — both within lessons and across units.
2. Choose a Strong Course Title
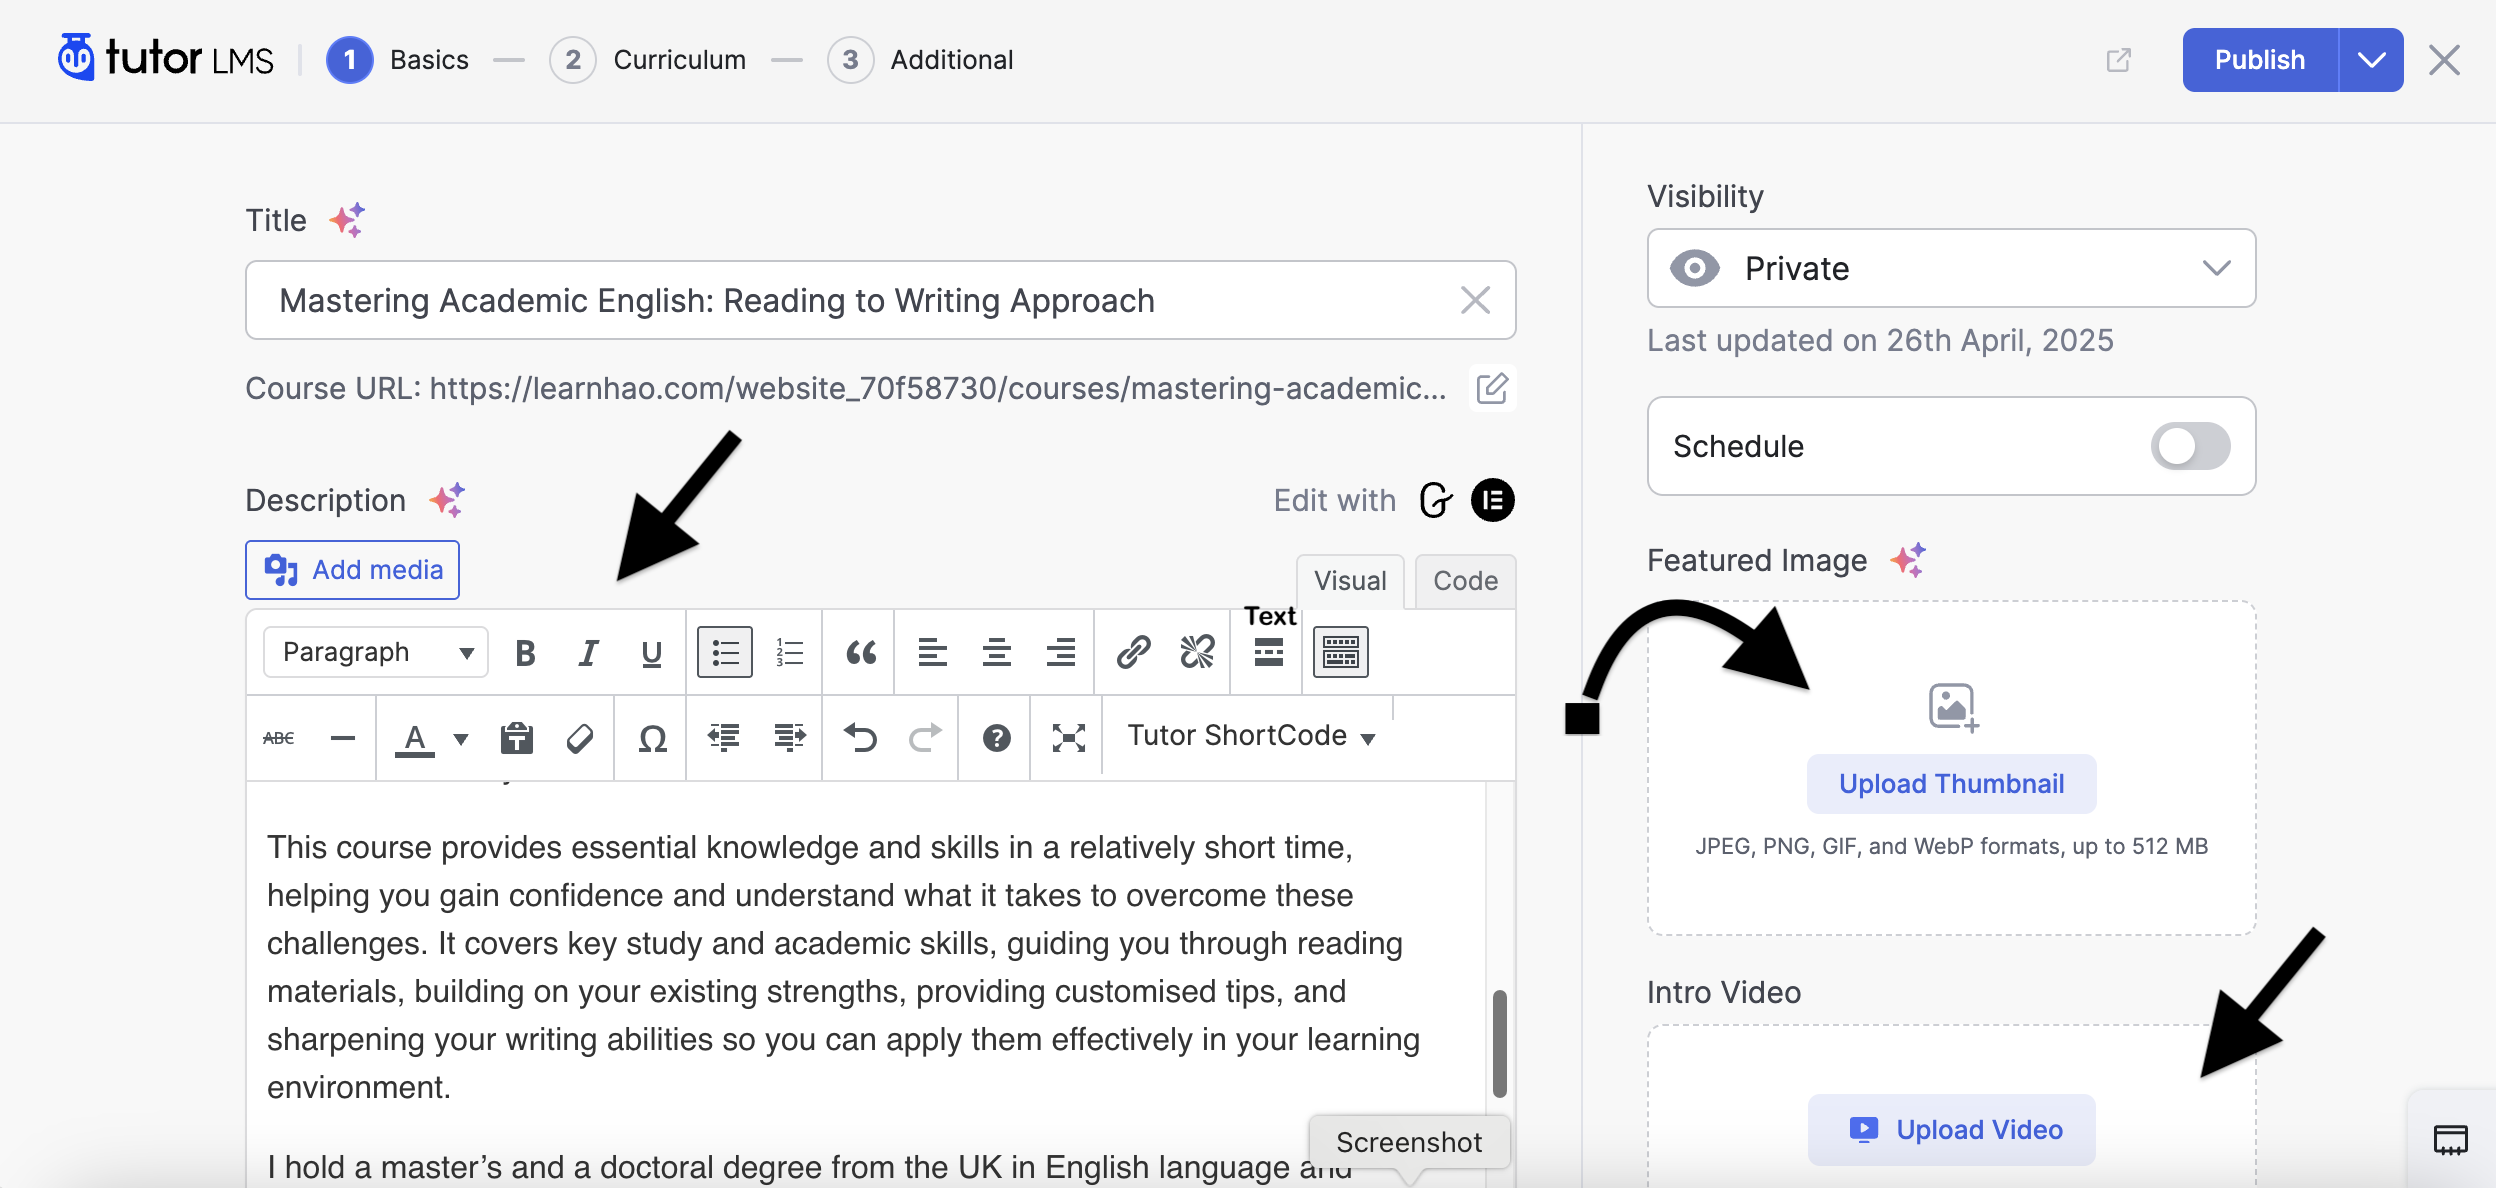
Select a clear and compelling title that captures the essence of your course and highlights the skills or knowledge it offers. (Refer to the screenshot for an example.)
If your course is paid, you may change the visibility setting (top right corner) to Private during course building.
3.
Provide Key Course Information
There are three key elements you must complete to present your course effectively. These help students decide whether your course is the right fit for them:
- Course Description
- Thumbnail Photo
- Introduction Video
Thumbnail Photo
Choose a unique, high-resolution thumbnail image that respects copyright laws. A strong thumbnail helps brand your course and distinguish it from others.

Introduction Video
You can use screen recording primarily for running slides; however, including a personal appearance in your introductory video can help build trust and establish a stronger connection with potential students.
Course Description
Write a clear and engaging description that shows students the value of your course and how it meets their needs.
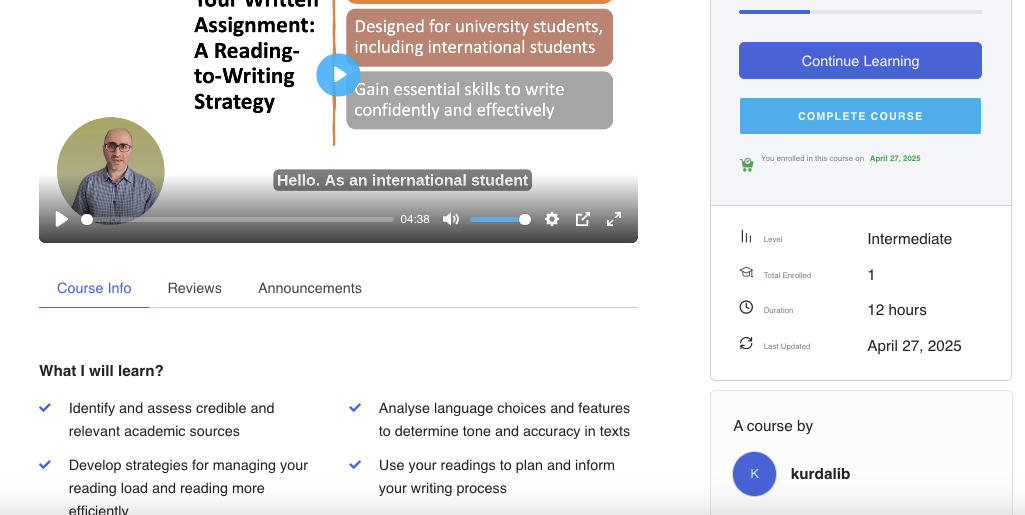
What to Include in Your Introductory Video
- Highlight the Course’s Unique Value
Explain what makes your course different and what learners will gain. Link this to real-world outcomes, such as knowledge and skills needed for academic success, career advancement, or personal development.
If your course solves a specific problem, briefly describe the problem, its negative impacts, and how your course addresses it. It’s helpful to provide a rough timeline for achieving results. - Establish Your Credibility
Briefly, share relevant qualifications, work experience, education, affiliations, certifications, or achievements (e.g., publications if you teach research writing). - Explain How Your Course Works
Briefly describe how you designed the course to maximize learning: your structure, topic selection, types of activities (e.g., interactive tasks, quizzes, handouts), and how these support engagement and achievement.
While Creating Your Course:
Save your work regularly to avoid losing progress.
Use the ‘Preview’ feature to view your course from a learner’s perspective.
- Attract more learners by offering a free course preview—create a separate sample course and set it to public view.
Important Tips
Consider aspects such as Student Interaction and Engagement:
- Discussion/Forum: This creates a space for students to interact with each other or instructors (e.g., discussion boards, announcements, reviews)
- Student Feedback: How will you gather feedback from students throughout the course? (e.g., Q&A, comments, surveys)
- Keep Videos Manageable:
Shorter videos are easier to upload and play. If you have a 10-minute video, consider splitting it into two shorter lessons. This reduces technical issues and keeps learners motivated.
- Enhance Accessibility and Engagement:
Whenever possible, add brief descriptions for lessons and tasks. For quizzes, explain the correct answers.
Bonus: Lesson descriptions appear when potential students hover over the ‘i’ icon on the course landing page, offering more insight to help them decide to enrol.
- That concludes Stage One: setting up your course’s basic information.
- Next, you will continue with the actual creation of your course content!
- Have questions? Visit our Instructor FAQ page for answers and guidance.